
Making Soap Geodes – It’s all about the layers. They’re the real secret to making these nifty crystal rocks. You can leave the middle crystal clear, sprinkle the chopped up pieces with sparkling mica of your choice to give it some shimmer, or use your soap scraps from other projects. You can even color half of the pieces and leave half clear to make it look even more like a real geode.
These geodes are the perfect way to use up those pesky soap scraps you’ve been saving. The outside layers should resemble sandstone or rock, so it’s a great way to also use cosmetic clay or colloidal powdered oats.
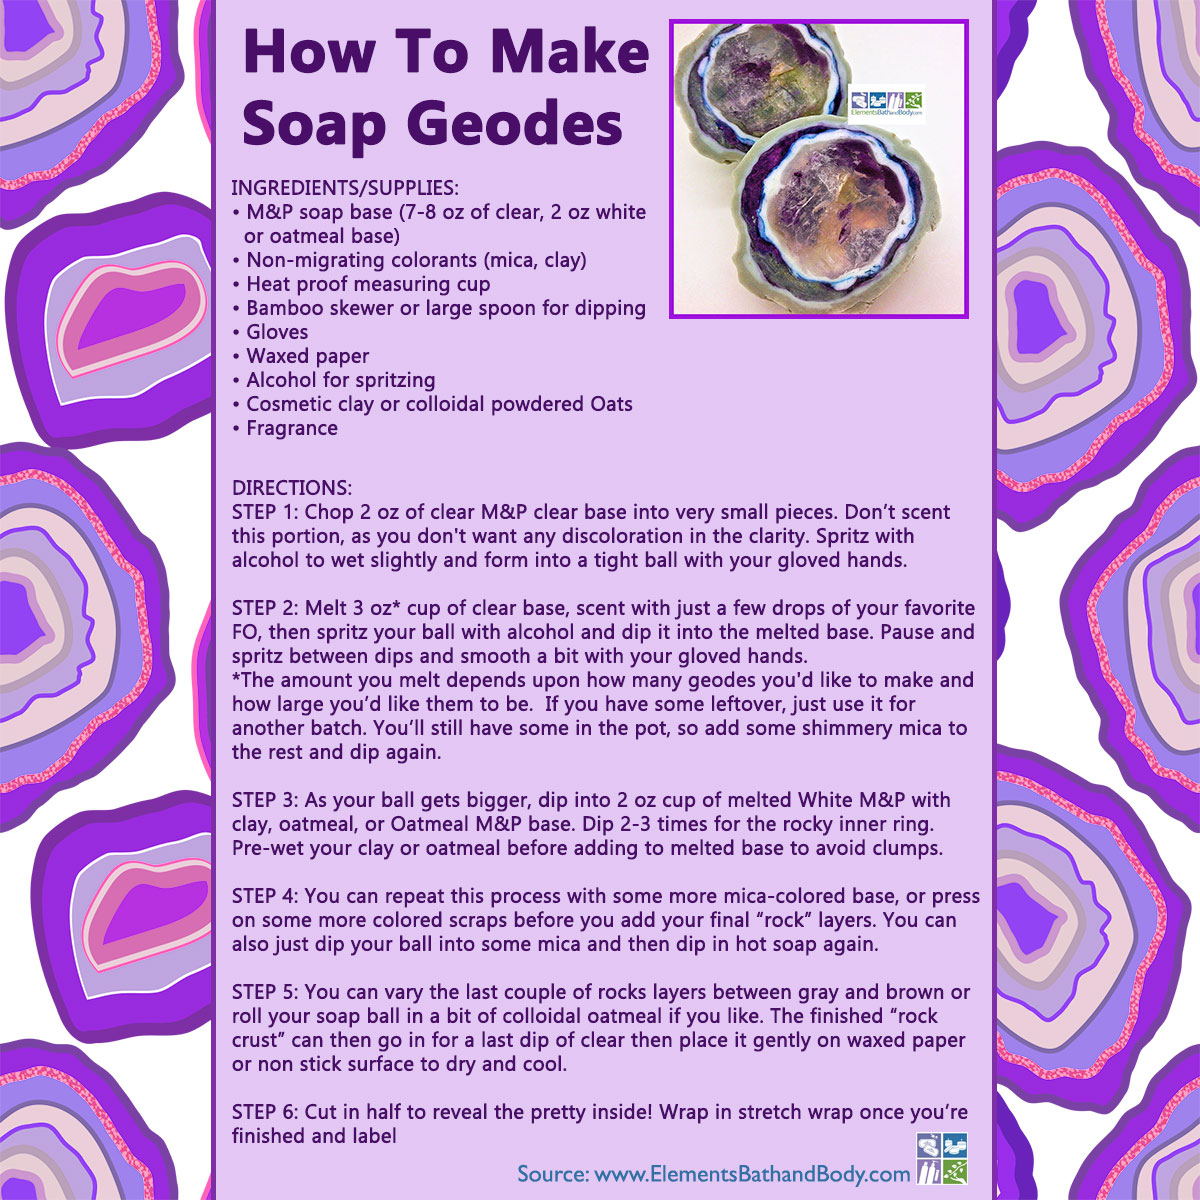
How to Make Soap Geodes
SUPPLIES
- Heat proof measuring cup
- Bamboo skewer or large spoon for dipping
- Gloves
- Waxed paper
- Alcohol for spritzing
INGREDIENTS
- Melt & Pour Soap Base (7-8 oz of clear, 2 oz white or oatmeal base)
- Non-migrating colorants (Mica, Clay)
- Cosmetic clay or colloidal powdered Oats
- Fragrance Oil
DIRECTIONS
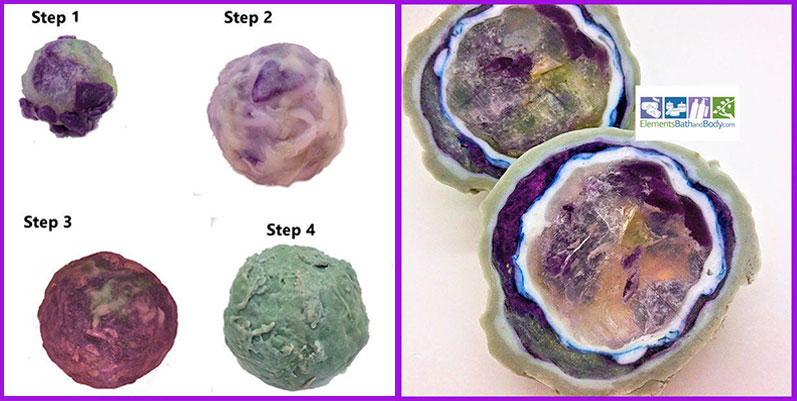
Step 1
Chop 2 oz of clear Melt and Pour Soap base into very small pieces. Don’t scent this portion, as you don’t want any discoloration in the clarity. Spritz with alcohol to wet slightly and form into a tight ball with your gloved hands.
Step 2
Melt 3 oz* cup of clear base, scent with just a few drops of your favorite FO, then spritz your ball with alcohol and dip it into the melted base. Pause and spritz between dips and smooth a bit with your gloved hands.
*The amount you melt depends upon how many geodes you’d like to make and how large you’d like them to be. If you have some leftover, just use it for another batch. You’ll still have some in the pot, so add some shimmery mica to the rest and dip again.
Step 3
As your ball gets bigger, dip into 2 oz cup of melted White Melt and Pour Soap with clay, oatmeal, or Oatmeal Melt and Pour Soap base. Dip 2-3 times for the rocky inner ring. Pre-wet your clay or oatmeal before adding to melted base to avoid clumps.
Step 4
You can repeat this process with some more mica-colored base, or press on some more colored scraps before you add your final “rock” layers. You can also just dip your ball into some mica and then dip in hot soap again.
Step 5
You can vary the last couple of rocks layers between gray and brown or roll your soap ball in a bit of colloidal oatmeal if you like. The finished “rock crust” can then go in for a last dip of clear then place it gently on waxed paper or non stick surface to dry and cool.
Step 6
Cut in half to reveal the pretty inside! Wrap in Stretch wrap once you’re finished and label.
SHARE ON SOCIAL MEDIA
![]()
![]() Share this tutorial on Facebook
Share this tutorial on Facebook![]()
![]() Tweet about this tutorial
Tweet about this tutorial


