
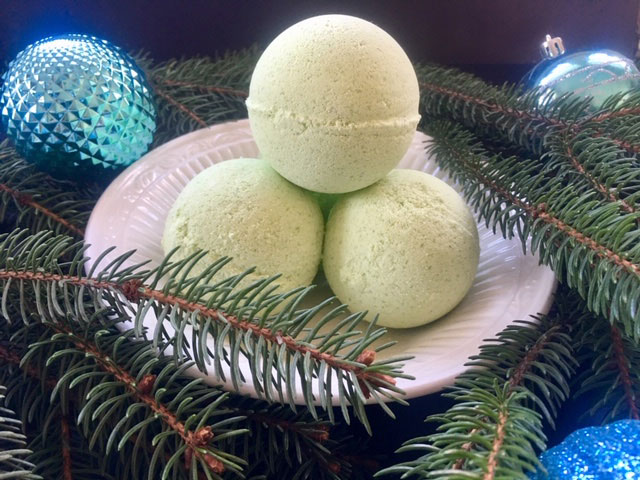
How to Make Christmas Ornament Bath Bomb
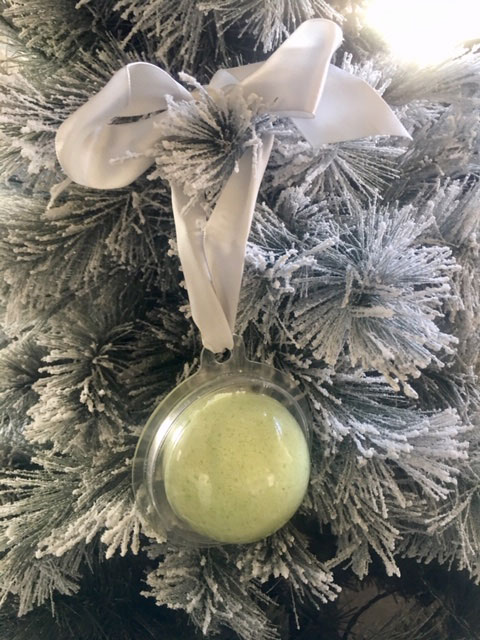
Our Bath Bomb and Fizzy Base is the easy way to make beautiful last-minute gifts your friends and family will love! Our plastic bath bomb molds not only make great molds, but can be used as secure packaging and make easy holiday ornaments, too! Simply tie on a ribbon and hang it on your Christmas tree.
This recipe includes added shea butter. Shea butter not only adds a touch of decadence to these bath bombs, it also allows them to pop right out of the molds. Feel free to substitute mango butter or cocoa butter.
INFORMATION
- Difficulty: Beginner
- Yield: 7 Bath Bombs
TIMING
- Prep Time: 5 Minutes
- Perform Time: 20 Minutes
- Drying Time: 4 Hours
- Total Time: 4 Hour 25 Minutes (25 minutes active time)
SUPPLIES
- Digital Scale
- 7 x 2.6” Plastic Bath Bomb Molds
- Large Mixing Bowl
- Small Microwavable Bowl
- Paper Towels
- Scissors
- 1″ Wide Satin Ribbon or Other Ribbon
- Latex or Nitrile Gloves
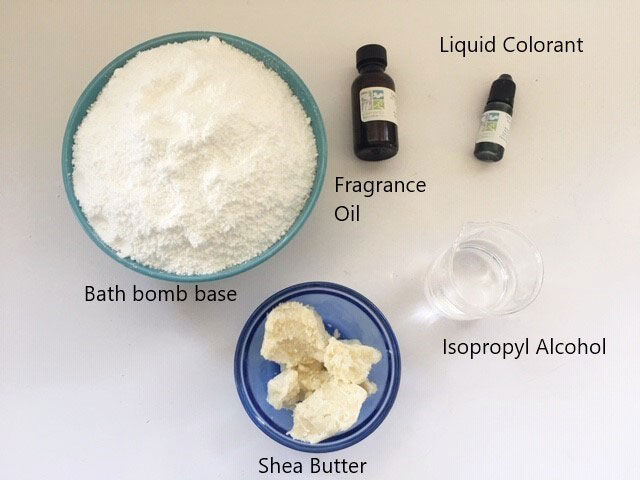
INGREDIENTS
- 2 lbs Bath Bomb & Fizzy Base
- 2 oz Shea Butter
- 10 ml / 2 tsp Grass Green Liquid Colorant or Water-Soluble Liquid Colorant of Your Choice
- 0.66 oz Mistletoe Kisses Fragrance Oil or Holiday Fragrance Oil or Your Choice
- 2 oz 91% Isopropyl Alcohol (available at any pharmacy)
DIRECTIONS
Before starting this tutorial please make sure to read all instructions. Use caution when handling melted oils. Do not weigh fragrance oils into plastic containers; use glass or stainless steel. Use gloves when mixing to keep your manicure from getting scratched.
Step 1 – Mix the Bath Bomb Base
Melt the shea butter in a small microwaveable bowl for about 2 minutes on high power, or until melted, stirring midway through. Set aside to cool briefly.
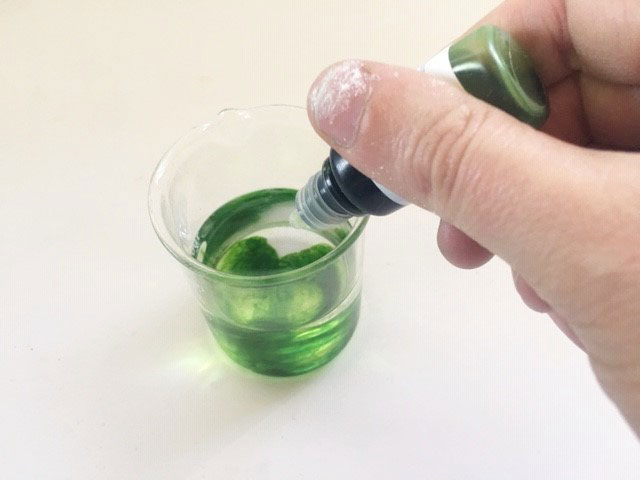
Mix the liquid colorant in the isopropyl alcohol.
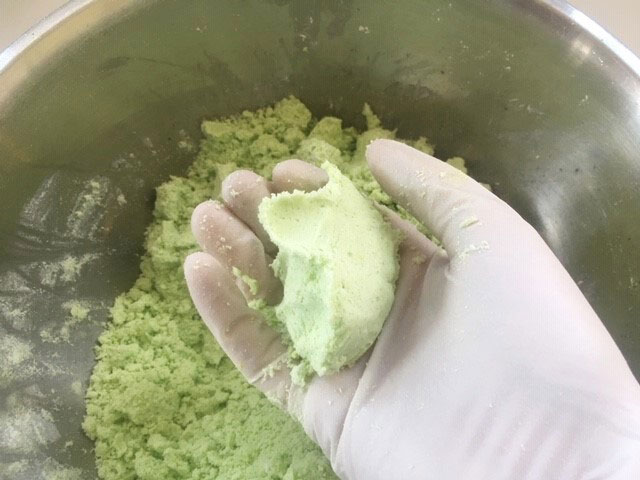
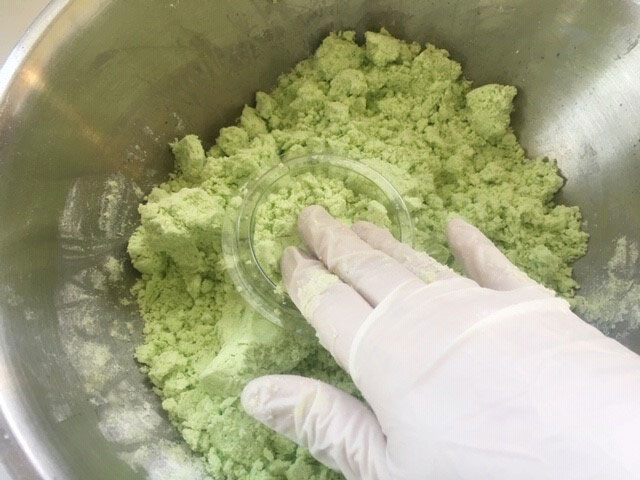
Add the shea butter and isopropyl alcohol mixture to the bath bomb base in a large mixing bowl. Mix thoroughly using your hands. Check the consistency of the mixture. It should form distinct clumps when squeezed. If it seems too crumbly, add a couple drops of isopropyl alcohol.
Step 2 – Mold the bath bombs
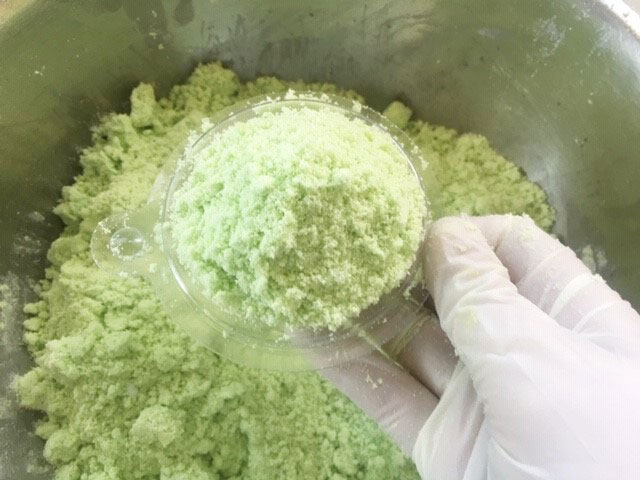
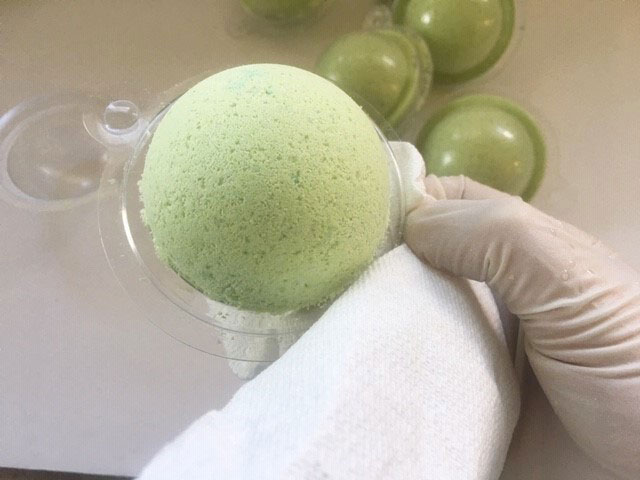
Gently press some of the mixture in one half of the plastic bath bomb mold.
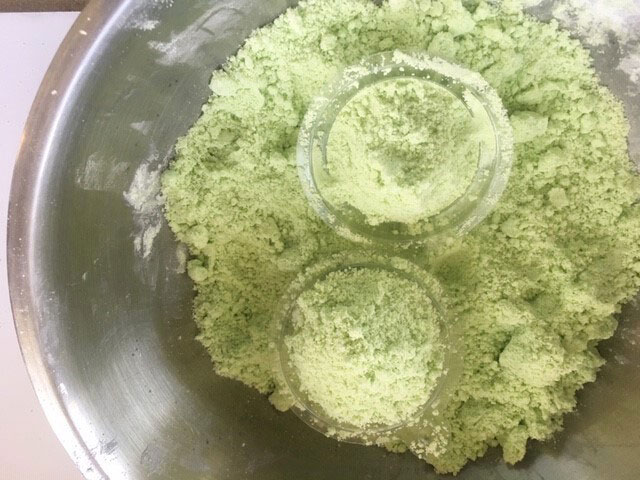
Mound a little more mixture in the center of the bath bomb. Clean off the edges of the mold.
Repeat with the second half. (Note: make sure you are using the corresponding half of the mold!)
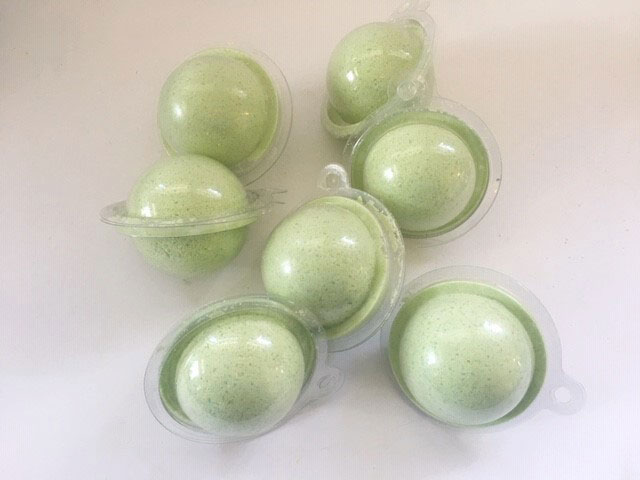
Press the two halves together and line up the eyelets.

Repeat with the remaining molds.
Step 3 – Finish the bath bombs
Allow the bath bombs to sit on the counter top for two hours. Unsnap the covers and clean the edges with a paper towel, if desired. This step is not necessary, but it does make a smoother presentation.
Allow the bath bombs to dry with one half of the molds removed for two more hours or overnight. Remove from the molds or snap the molds shut and tie a ribbon though the holes in each mold. Hang on the tree and enjoy! Be sure to tell your recipients to use the bath bombs within a couple of months. They won’t keep until next Christmas!
SHARE ON SOCIAL MEDIA
![]()
![]() Share this tutorial on Facebook
Share this tutorial on Facebook![]()
![]() Tweet about this tutorial
Tweet about this tutorial


