
If you ask many bath product formulators what their number one most finicky product to create is, many will say bath bombs. In this guide, you’ll find some of the common pitfalls associated with making bath bombs. We want you to spend less time frustrated and more time relaxing in your tub!
More so than with other bath products, making bath bombs is a variable art. Humidity is the number one enemy of bath bombs, and if you live in a humid climate, you are going to have a more challenging experience than someone who lives in the desert. Avoid making bath bombs on rainy days. I usually take July and August off from bath bomb making because it is just too humid in the Midwest. Using a dehumidifier in your work space can be helpful. Here are a few other bath bomb troubleshooting issues:
My bath bombs are cracking. What do I do?
Your mixture is too dry. Add a dash of 91% rubbing alcohol and mix well.
Make sure you are molding your bath bombs using the techniques shown here. Do not pack the mixture into stainless steel molds because it is too difficult to get it to be perfectly even which leads to cracks. Just heap the mixture into both halves of the mold and cram it together. Do not twist, or that might cause it to crack, too! For the plastic clamshell molds, very gently press a little mixture in each half. Because of the shape of the molds, you cannot heap much mixture into them, but do what you can. Do not twist!
My bath bombs are flattening out on the bottom. What do I do?
Assuming you are using a good drying system, your mixture is too wet. Add a little baking soda and mix well.
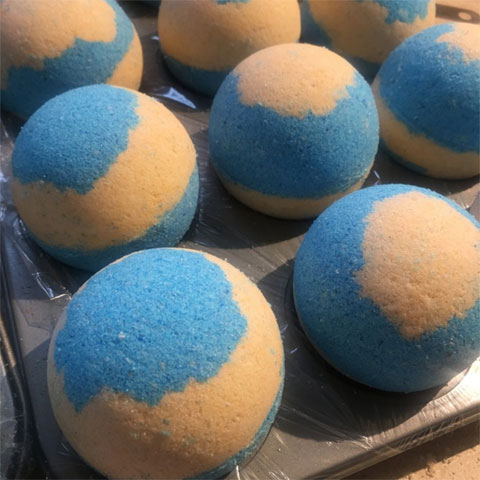
My bath bombs looked perfect when I made them but are bumpy and warty the next day. What happened?
Your mixture has too much water in it. Try using 91% rubbing alcohol and oils to moisten your mixture instead of witch hazel. It might also be too humid in your house. Try a dehumidifier, or wait until a dryer season.
My bath bomb mixture is sticking to my molds. What do I do?
Once in a while, a fragrance oil or essential oil blend will make your mixture a little sticky making it difficult to cleanly unmold your bath bombs. I have found the most difficulty with recipes that contain a lot of sweet orange or tangerine essential oil (but not grapefruit, lemon or lime.) Add a dash of liquid oil to your mixture in mix well. Wipe the mold clean with your fingers between each bomb to keep it from building up and sticking.
My bath bombs sink to the bottom of the tub. How can I get them to spin and float?
Spinning and floating bath bombs are the holy grail for many bath bomb makers. To achieve this, do not pack your mixture too tight. When using stainless steel mold, heap the mixture without packing into the molds. When using the plastic clamshell molds, gently pack your mixture into the molds; do not pack it too tight. I have found that it is easiest to create floating, spinning bombs with stainless steel molds. Using plenty of butter and oil in your recipe will also help because oil is less dense than water.
My bath bombs are staining my tub. Help!
Use Water Soluble Liquid Colorant to color your bath bombs. Polysorbate 80 can mitigate staining if you use micas or lakes, but water soluble colors are an even safer option for preventing ring around the tub.
I just got an order for 300 bath bombs. How am I going to do this?!
First, take a deep breath. You can do this!
You do not need an expensive press to make bath bombs quickly. With practice, our stainless steel molds are as fast, or faster than a press and create beautiful results.
The best thing I found to speed up my process, is using a really big mixing bowl. I use a 30 qt. stainless steel mixing bowl I found at a restaurant supply store to make up a 10 lb batch of base. This large bowl allows me to rapidly mix up my base with my hands without spilling. Mixing by hand is just as fast as using a commercial mixer, if you use a large enough bowl.
Do try making larger batches of bath bombs, but don’t try to make up more than about 10 lbs. of base (one double recipe from this tutorial) because it is hard to get all of your bath bombs made before it starts to dry out.
Prep as much of your materials ahead of time as you can. Pre-line several muffin pans with plastic wrap for drying. As they are filled, you can carry them away from your workspace to dry. I make up all of the essential oil blends I am using for one session all at once. You can also pre-weigh your butters, prep your colors and set out all of your dry ingredients to be added in an assembly line. I don’t pre-weigh my dry ingredients because I weigh them while my butters melt and I don’t have the space for it.
Using these techniques, I can make about 100 fancy decorated 3” bath bombs in about an afternoon. This is 5 double batches of my recipe. If you need plain bath bombs, you could make about 160 in the same time period.
We hope this guide helps you create beautiful bath bombs. With a little practice, you’ll be making dozens of bath bombs in no time! If you break a few bath bombs, take heart. Even broken bath bombs will fizz and beautifully scent your bath water.
Find More Bath Bomb Making Info Below!
SHARE ON SOCIAL MEDIA
![]()
![]() Share this tutorial on Facebook
Share this tutorial on Facebook![]()
![]() Tweet about this tutorial
Tweet about this tutorial


