

How to Make Kid’s Lip Balm
This tutorial is super easy and fun! It’s a great one-on-one activity and fantastic as a kid’s group project as well. The age suggestion is 6 years and older, but of course, the younger the child, the more supervision required. This recipe is measured for one child, but it can easily be planned for a group.
INFORMATION
- Difficulty: Beginner
- Yield: 7 Tubes of Lip Balm
TIMING
- Prep Time / Clean Up: 10 Minutes
- Perform Time: 10 Minutes
- Setting Time: 10 Minutes
- Total Time: 30 Minutes
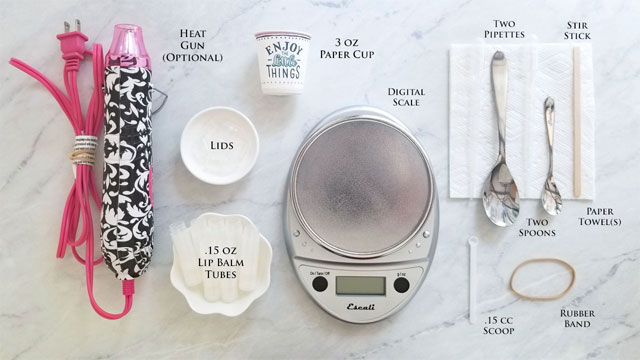
SUPPLIES
- Digital Scale
- Spoon (to scoop out base)
- Spoon (to freeze to check lip balm color)
- Small Paper Cup or Container (to melt base in) (a 3 oz paper cup was used for this tutorial)
- Stir Stick (skinny stick or popsicle stick, easily found in the craft section of your local superstore)
- 2 x Pipettes
- 7 x 0.15 oz Lip Tubes with Cap or you can pick whatever tubes and lids you would like.
(If choosing other tubes/lids make sure you choose both tubes and lids as they are be sold separately. Click Here to take a look at the selection we offer. - 0.15 cc Measuring Scoop
- Rubber Band
- Paper Towel(s)
- Heat Gun or Hair Dryer (optional)
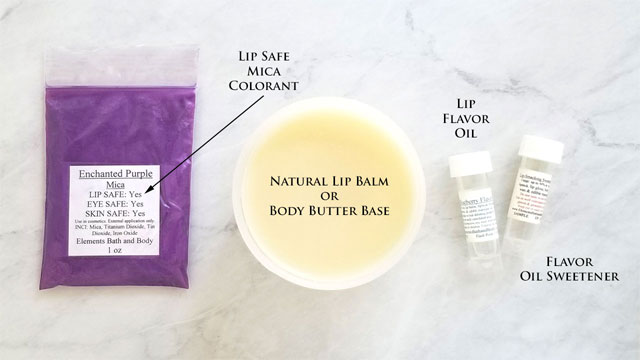
INGREDIENTS
- 1.25 oz / 35 g Natural Lip Balm & Body Butter Base
- Up to 1 mL (1-3 %) Lip Flavor Oil
- Up to 1 mL (1-3 %) Flavor Oil Sweetener (optional) or Essential Oil (Peppermint Essential Oil is pretty strong so only use up to 1% of base or .3 mL)
- Up to 4 x .15 cc Scoops Lip Safe Mica (optional) (make sure the mica is lip safe, most reds, oranges, yellows, and purples are lip safe)
DIRECTIONS
Before starting this tutorial, please make sure to read all instructions. When using this tutorial with children, make sure to supervise them at all times. When microwaving, the goal is only to melt the base, not to heat it. The temperature of the base should not be hot, just warm enough to melt. Have fun and try as many flavor and color combinations as you would like. Just make sure the mica that you are using is lip safe.
Step 1 – Prepare Lip Balm
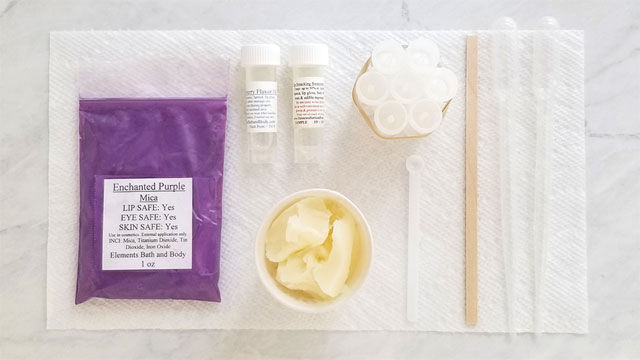
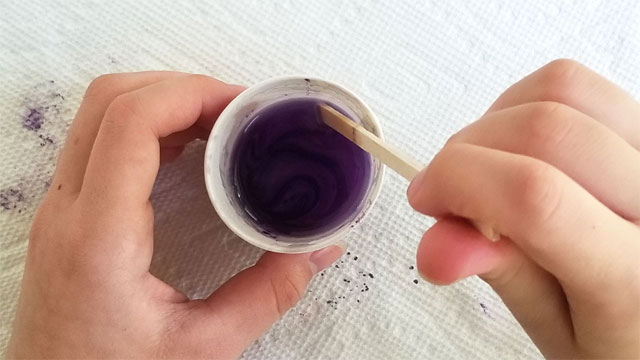
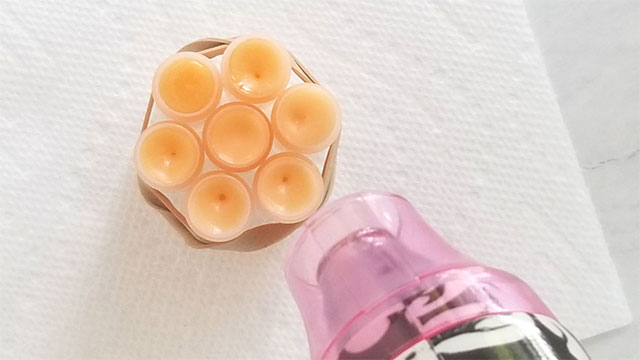
Put one spoon into freezer. Measure 1.25 oz / 35 g Lip Balm Base into paper cup. Prepare work station with a paper towel, 2 pipettes, stir stick, .15cc scoop, a bundle of 7 lip balm tubes with lids off held together by a rubber band, a Lip Flavor/Essential Oil, and Lip Safe Mica & Flavor Oil Sweetener (if desired).
Microwave base to melt. Start with 15 seconds, then 10, then 7, stirring in between. As the base gets closer to being melted, decrease the melt time.
Step 2 – Add Color, Flavor, and Sweetener to Lip Balm
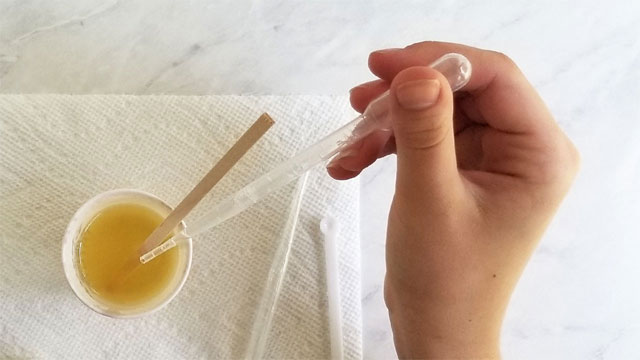
Add Lip Flavor/Essential Oil and Sweetener (if desired) when base is melted. Use the pipette to add up to 3% of the base for each or 1 mL (each). (It is easiest to figure this amount using grams. Since we are using 35 g of the base, we multiply 35 x .03 to get 3% of the base or 1.05 g. Measuring just one gram on many scales isn’t very accurate, but one gram is roughly equivalent to 1 mL, so use up to 1 mL.)
Add desired amount of colorant up to four .15 cc scoops.
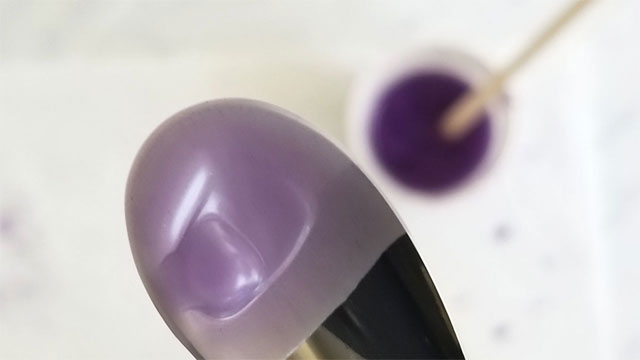
To test color of finished lip balm, dip tip of frozen spoon into colored base. The mixture will harden on the spoon and show you the true color. Add more color if needed. Microwave around 5 seconds at a time if needed so that the mixture is fluid enough to pour.
Step 3 – Pour Lip Balm
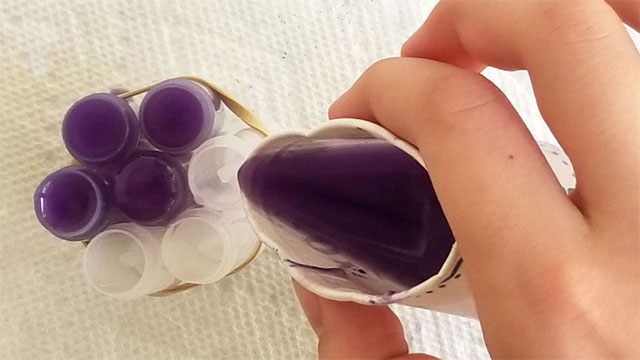
Crease the cup and rest it on the rim of one of the lip balm tubes and pour until full. (If you don’t touch the cup to the rim, the liquid may dribble down the cup and make a mess.) Continue to fill the tubes until all seven are full.
Place tubes in freezer or refrigerator for 10 minutes. If little holes develop in the middle, a hair dryer or craft heat gun can be used to re-melt the top portion. (Keep the heating element a safe distance away from the tops, so as not to melt the tubes or blow the liquid around. This step is best left to an adult an older child. Return tubes to the freezer or refrigerator for a few minutes.)
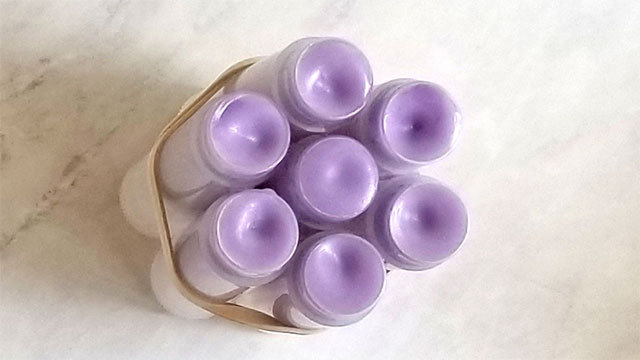
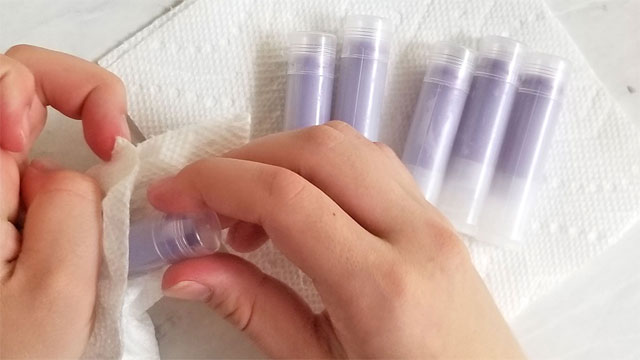
Next, remove rubber band and clean up tubes with paper towels. Add caps and label if desired. Enjoy!
SHARE ON SOCIAL MEDIA
![]()
![]() Share this tutorial on Facebook
Share this tutorial on Facebook![]()
![]() Tweet about this tutorial
Tweet about this tutorial


