
How to Make a Hanger Swirl Tool
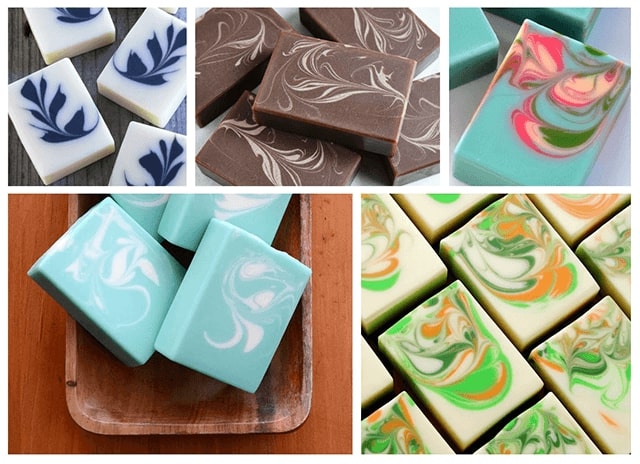
Have you ever wanted to make swirls like the ones in these lovely soaps? If you are not familiar with this technique, it is called a Hanger Swirl. You may not have a swirl tool, but you can make one, probably from things you already have in your home.
All of these soaps above were made with a homemade hanger tool. Through trial and error I found that the tool needed to be thicker than a plain old hanger, which had little impact to the design. (Sometimes with thicker batter I couldn’t even tell there was a swirl at all.) The straws are the key. They provide a proper thickness to make beautiful swirls. And these tools are so quick and easy to make!
INFORMATION
- Difficulty: Easy
- Yield: 1 Swirl Tool
TIMING
- Prep Time: 5 Minutes
- Perform Time: 10 Minutes
- Total Time: 15 Minutes
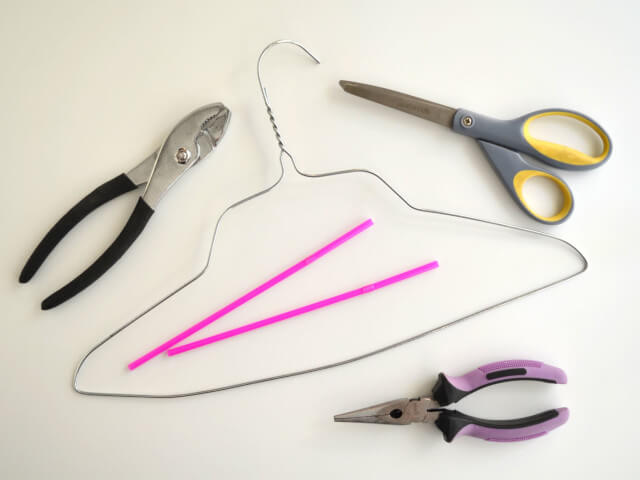
SUPPLIES
- Non-Coated Silver Metal Hanger or approximately 24” long Plastic Coated Clothesline Wire (usually green). Do not use coated hangers because the coating will flake off in your soap.
- 2 Flexible Drinking Straws
- Scissors
- Pliers (one with wire cutter), a second set pliers is optional
- Soap Mold (that you want to fit the swirl tool to)
DIRECTIONS
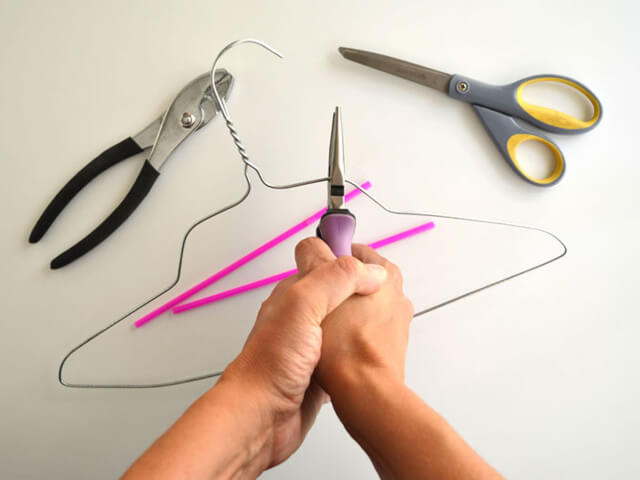
Step 1 – Cut Hanger
Cut hanger on both sides as shown. Open and straighten wire.
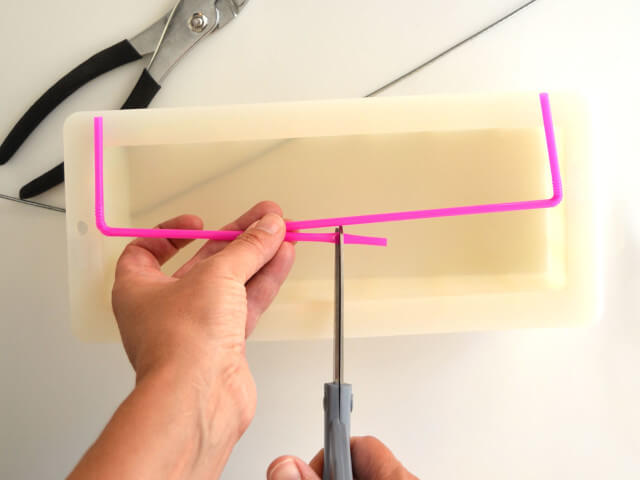
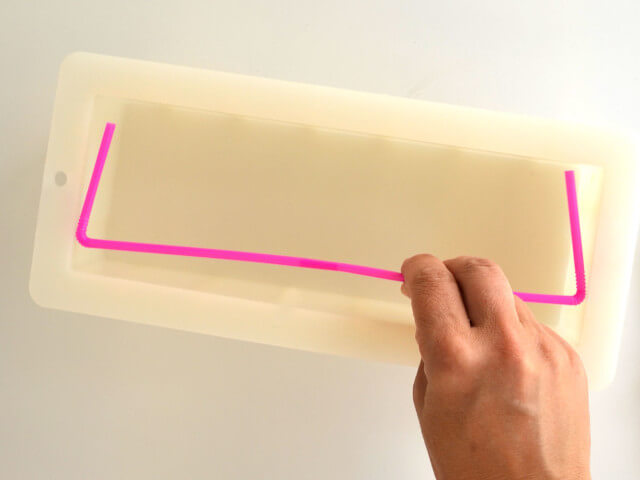
Step 2 – Cut Straw
Bend straws and hold them to fit inside of the mold. Allow them to overlap and cut off excess, leaving about 1” as shown.
Step 3 – Fit Straws Together
Tuck one of the straws and fit it inside the other. Adjust to make sure the straws fit the mold and move freely.
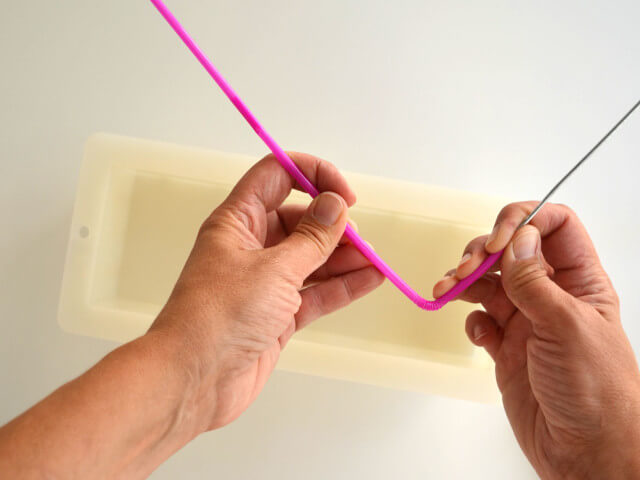
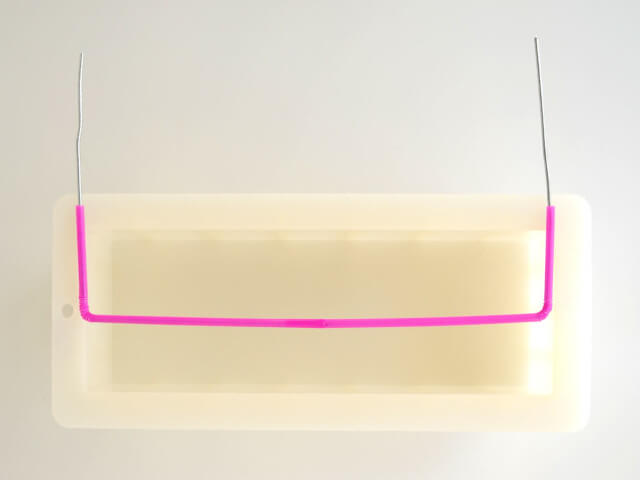
Step 4 – Insert Wire and Bend
Bend straws open and insert wire. Center the straws in the middle of the wire. Bend one end of the wire and straw at the flexible part. Use pliers if necessary.
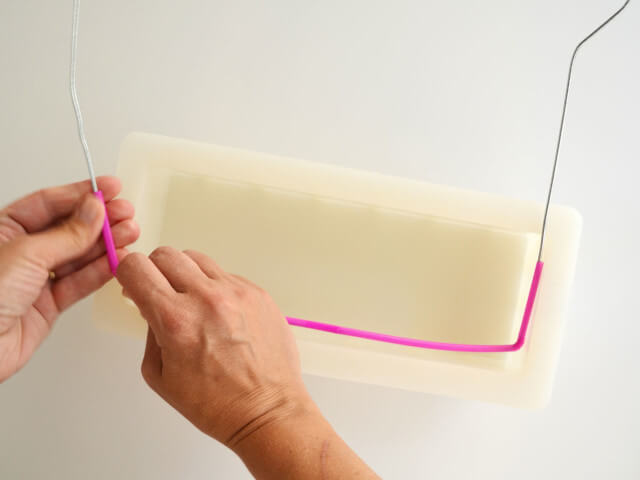
Step 5 – Bend other End
Using hands or pliers, bend the opposite end. Test by inserting it into the mold and make sure it touches both ends, but it must move freely. Make sure the grooves on the flexible part don’t get caught on the edge of the mold when moving the tool. (It may take a few tries to get the bend in the right place.)
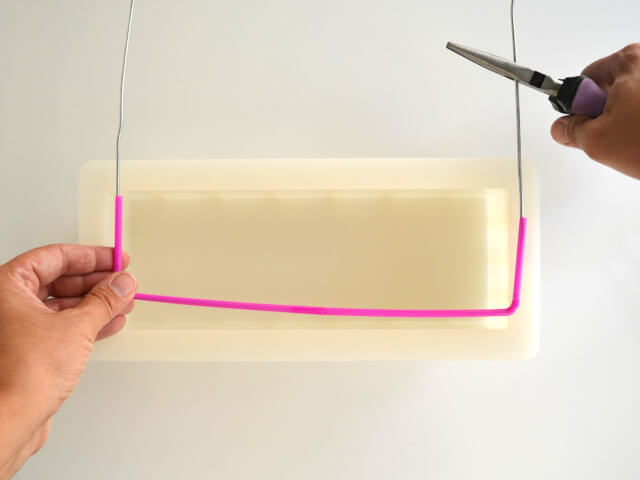
Step 6 – Cut Wire
Next, cut off excess wire on both ends.
And you are finished! Have fun swirling!
Use this swirl tool to make Peppermint & Tea Tree Swirl Cold Process Soap!
Click Here for the tutorial.
PDF DOWNLOAD FOR YOUR CONVENIENCE
SHARE ON SOCIAL MEDIA
![]()
![]() Share this tutorial on Facebook
Share this tutorial on Facebook![]()
![]() Tweet about this tutorial
Tweet about this tutorial


