
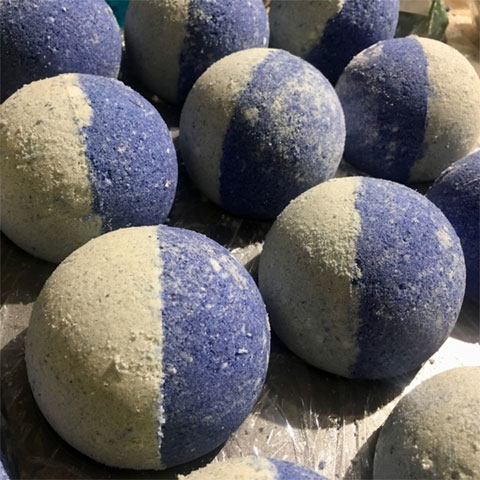
Bath bombs are the perfect canvas for creative expression. With the right recipe, a great fragrance, a few colors and appropriate molding instructions you can make an endless variety of bath bombs that will thrill your friends, family and customers! In this guide, you will find a recipe for making sturdy, luxurious bath bombs that are beautiful and ship well. You’ll also find directions for using our pre-made Bath Bomb and Fizzy Base, too. This base makes a terrific shortcut for making bath bombs that is also very beginner friendly. Lastly, this guide contains information on shipping and storing your bath bomb creations.
For an explanation of the ingredients used in bath bombs, Click Here for our tutorial on formulating perfect bath bombs
Quick Links
Recipes: From Scratch | Using Fizzy Base
Molding: Perfector | Stainless Steel | Plastic
Care: Drying Storing and Shipping your Bath Bombs
Recipe For Perfect Bath Bombs From Scratch
If you don’t want to formulate your own bath bomb recipe, the following formula is an excellent one to use. This recipe makes 9-10 large 3” bath bombs that are hard enough to ship cross country. If you want to use less fragrance oil, add an equal amount of carrier oil to make up the difference. You may use any mold of your choice. Smaller molds will yield more bath bombs.
INFORMATION
- Difficulty: Intermediate
- Yield: 9-10 Large (3″, about 8 oz each) Bath Bombs
TIMING
- Prep Time / Clean Up: 15 Minutes
- Perform Time: 25 Minutes
- Drying Time: 2 Hours
- Total Time: 2 Hours 40 Minutes, 40 Minutes Active Time
SUPPLIES
- Digital Scale
- Bath Bomb Mold of your choice
- 2 Large mixing bowls
- Spoon or spatula
- Microwaveable bowl, or 4-cup pyrex measuring cup
- Latex or nitrile gloves
INGREDIENTS
- 45 oz / 1276 g Baking Soda (available at grocery or bulk discount stores)
- 20 oz / 567 g Citric Acid
- 6 oz / 170.1 g Epsom Salts (available at pharmacies)
- 1 oz / 28.3 g White Kaolin Clay
- 1 oz / 28.3 g Cream of Tartar (available from the grocery store. Try the bulk aisle for the best price.)
- 0.5 oz Sodium Lauryl Sulfoacetate (SLSA) (Optional)
- 1 oz / 28.3 g Cocoa Butter
- 2 oz / 56.7 g Shea Butter OR Mango Butter
- 1 oz / 28.3 g Sunflower Oil, or other light carrier oil of your choice
- 1 oz / 28.3 g Polysorbate 80
- 2 oz / 56.7 g Fragrance Oil or Essential Oil
- 2 oz / 56.7 g 91% Isopropyl Alcohol (available from pharmacies) *
- 1 tsp / 5 mL Water Soluble Liquid Colorant or tap water.
*Note: if using 99% Isopropyl Alcohol, add ½ tsp additional water or liquid colorant to your recipe. This product is sometimes available at pharmacies and is available online from Amazon.
DIRECTIONS
Before starting this tutorial please make sure to read all instructions. Use caution when handling melted oils. Do not weigh fragrance oils into plastic containers; use glass or stainless steel. Use gloves when mixing to keep your manicure from getting scratched.
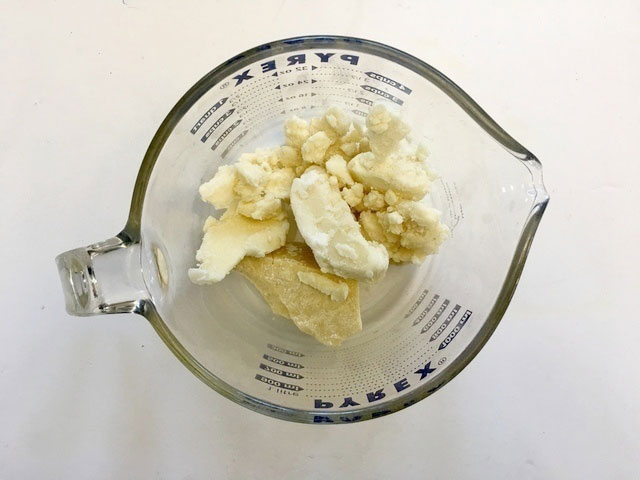
Melt the cocoa butter and shea butter or mango butter in a microwaveable bowl or 4-cup Pyrex measuring cup for about 3 minutes on high power, or until melted, stirring midway through. Alternatively, melt the butter mixture in a double boiler on the stove top. Set aside to cool briefly.
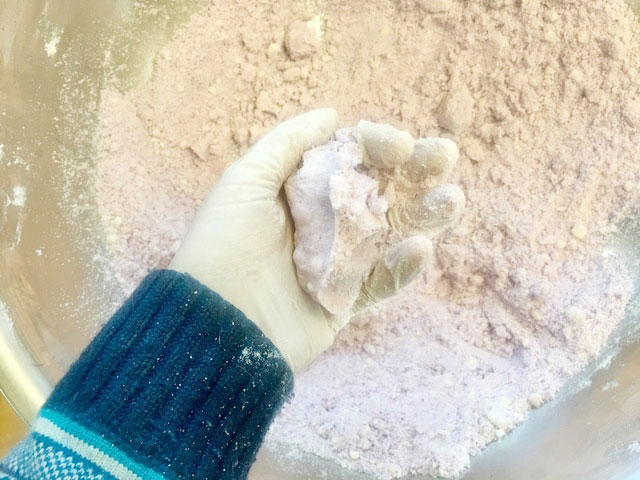
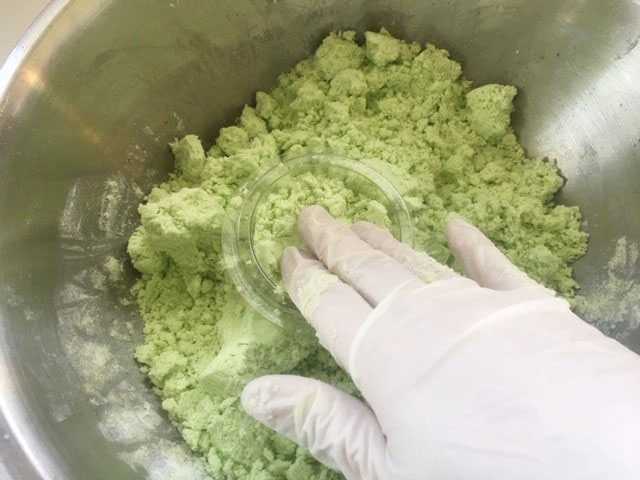
While your oils cool, combine the dry ingredients in a large mixing bowl. Break up any clumps using your fingers.

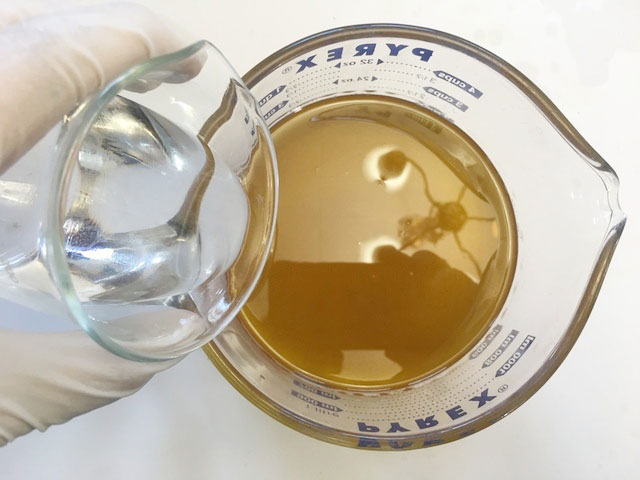
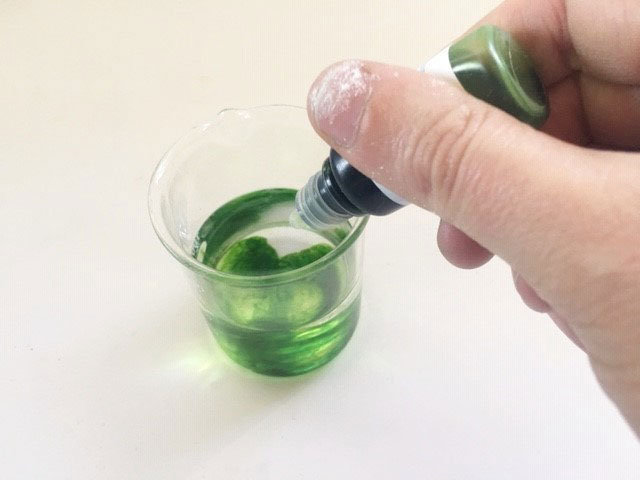
Add the sunflower oil, polysorbate 80, isopropyl alcohol, liquid colorant (or tap water) and the fragrance oil to the melted butters. Stir to combine.
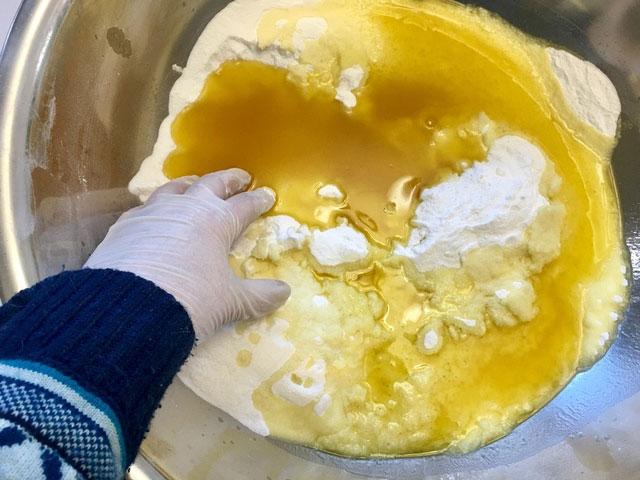
Pour the oil mixture over the dry ingredients. Mix with your hands to combine, breaking up any clumps.
Bath Bomb Recipe Using Bath Bomb And Fizzy Base
If you want to make bath bomb making even easier, try using our Bath Bomb and Fizzy Base. To assist with unmolding, its best to add a little extra butter to these bath bombs. Cocoa butter will give you the hardest bath bombs, but shea butter and mango butter make nice bombs, too. This recipe makes 7 x 2.6” bath bombs. Using a larger mold will yield fewer bath bombs. A smaller mold will make more bath bombs.
INFORMATION
- Difficulty: Beginner
- Yield: 7 x (2.6″, about 4.5 oz each) Bath Bombs
TIMING
- Prep Time / Clean Up: 5 Minutes
- Perform Time: 20 Minutes
- Drying Time: 4 Hours
- Total Time: 4 Hours 25 Minutes, 25 Minutes Active Time
SUPPLIES
- Digital Scale
- Bath Bomb Mold of your choice
- Large Mixing Bowl
- Small microwaveable bowl
- Latex or nitrile gloves
INGREDIENTS
- 2 lbs Bath Bomb and Fizzy Base
- 2 oz Butter of Your Choice
- 10 ml / 2 tsp Water Soluble Liquid Colorant or tap water
- 0.66 oz Fragrance Oil or Essential Oil
- 2 oz 91% Isopropyl Alcohol (Available at any pharmacy.)*
*Note: if using 99% Isopropyl Alcohol, add ½ tsp additional water or liquid colorant to your recipe. This product is sometimes available at pharmacies and is available online from Amazon.
DIRECTIONS
Before starting this tutorial please make sure to read all instructions. Use caution when handling melted oils. Do not weigh fragrance oils into plastic containers; use glass or stainless steel. Use gloves when mixing to keep your manicure from getting scratched.
Melt the cocoa butter in a small microwaveable bowl for about 3 minutes on high power, or until melted, stirring midway through. Alternatively, melt the butter in a double boiler on the stove top. Set aside to cool briefly.
Mix the liquid colorant or tap water with the isopropyl alcohol.
Add the cocoa butter and isopropyl alcohol mixture to the bath bomb base in a large mixing bowl. Mix thoroughly using your hands, breaking up any clumps with your fingers.
How To Mold Bath Bombs Using Any Recipe
The technique you use to mold your bath bombs depends on which mold you choose. We sell three types of round Bath Bomb Molds. The Perfector is good for making tiny bath bombs quickly. Our Plastic Bath Bomb Molds are a great choice if you want protective displayable packaging for your bath bombs. The rigid plastic also holds the shape of the bath bombs while they dry. Our stainless steel molds are the fastest way to make bath bombs that are perfectly round.
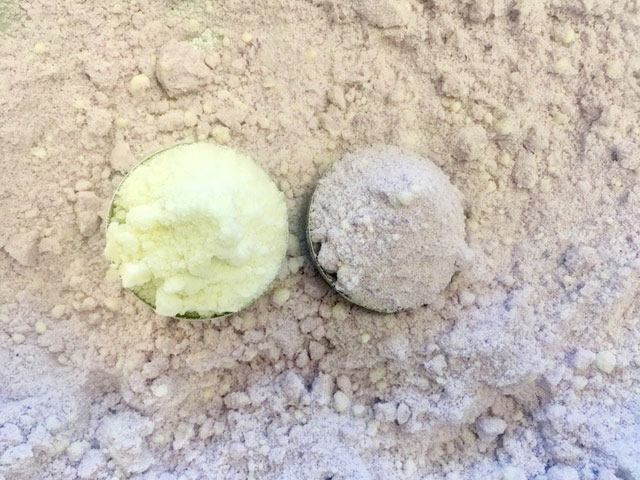
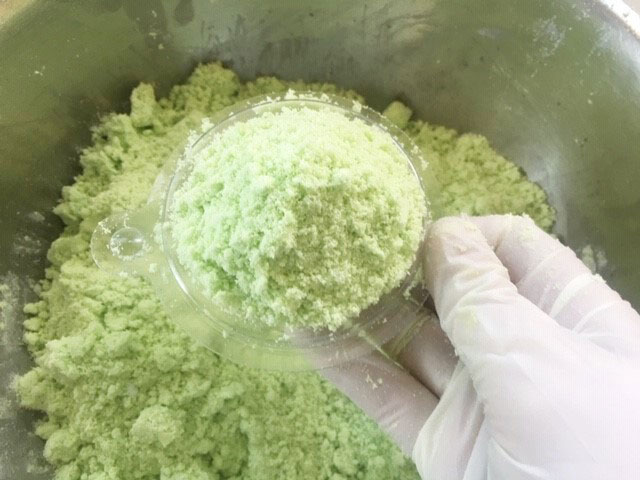
No matter what mold you choose, take a moment to check the consistency of your mixture. It should hold together when clumped.
All bath bombs take a little practice to make. Make a couple of practice bombs to familiarize yourself with the technique. Gently toss the bath bomb between your hands to see if it holds together. If it cracks apart, add a dash of isopropyl alcohol to your mixture. If it deforms or seems mushy, add a little baking soda. Once your mixture is the right consistency, you are ready to mold your bath bombs.
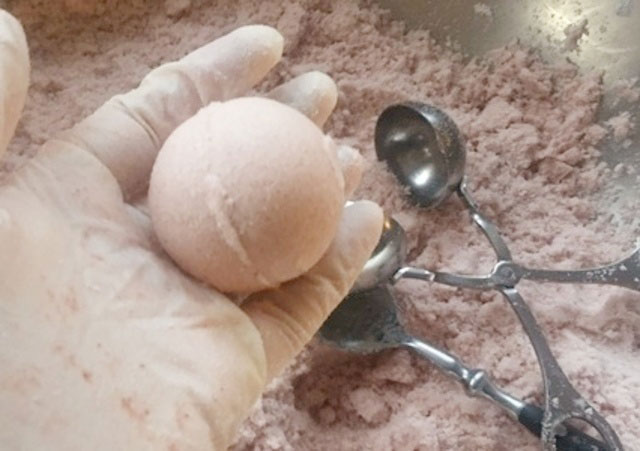
Molding Bath Bombs Using the Bath Bomb Perfector
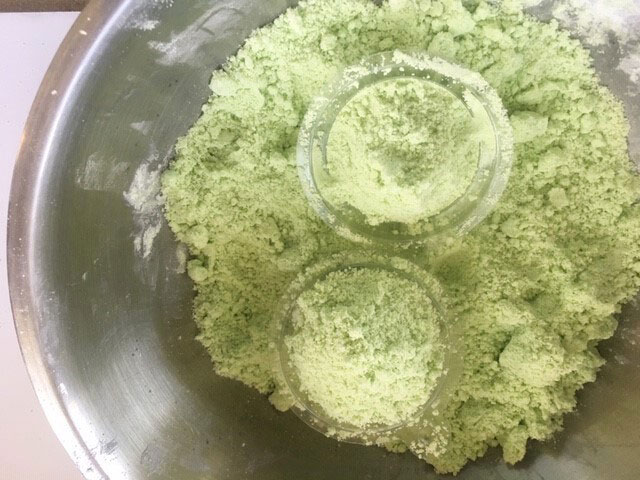
To make scooping easier, transfer your mixture to a narrow bowl. To mold the last couple of bath bombs in your batch, you may want to transfer the remainder to a small cup. Scoop up a generous amount of mixture with the Perfector.
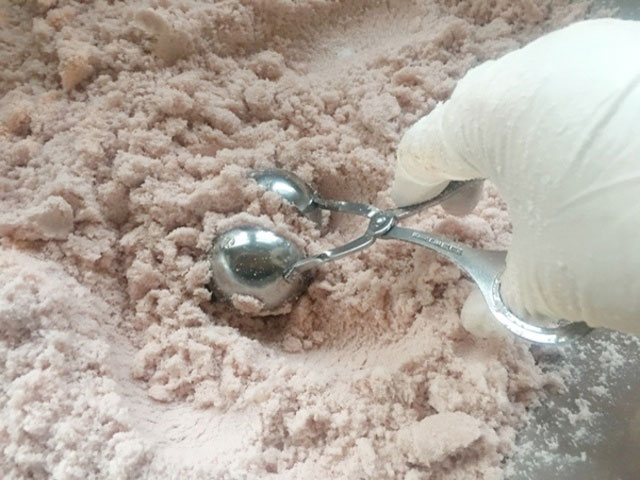
Squeeze it tight.

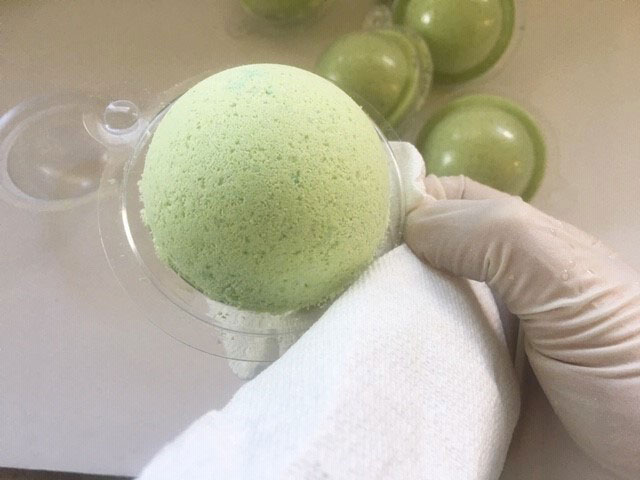
Clean the edges of the mold with your thumb. Tap on the mold using a metal spoon or butter knife. This loosens the bath bomb in the mold.
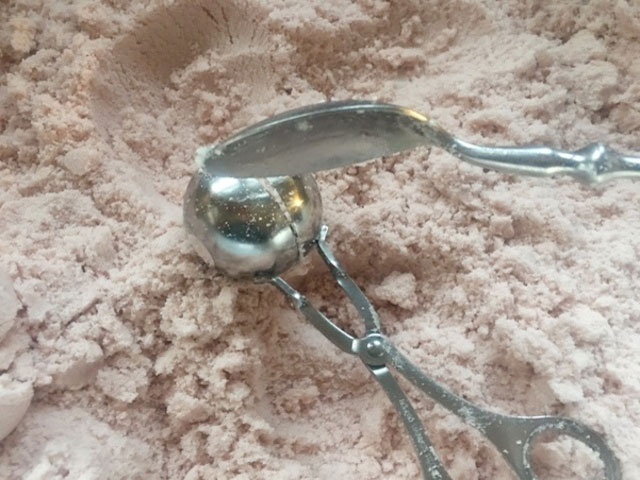
Release the bath bomb into your hand. Set it aside to dry.
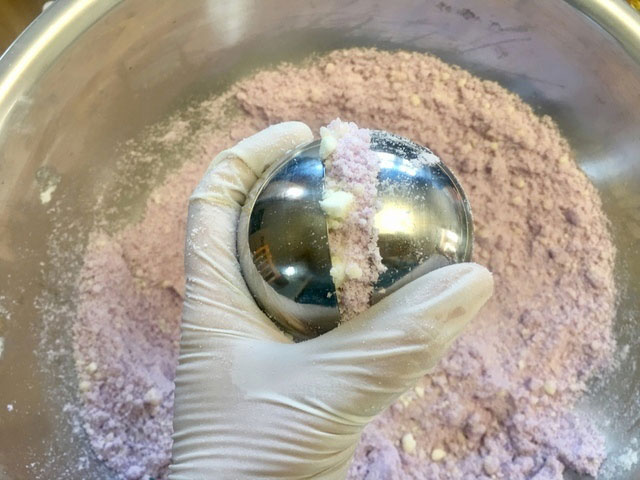
Molding Bath Bombs Using Stainless Steel Molds
Heap each half of the mold with your bath bomb mixture. Do not press the mixture or pack it down.
Cram the two halves of the mold together. Do not twist. Clean the edges of the mold with your thumb. Hold the mold in one hand and use your opposite hand to give the mold a little squeeze.
Remove one half of the mold and set aside. Invert the bath bomb into your palm and remove the other half of the mold.
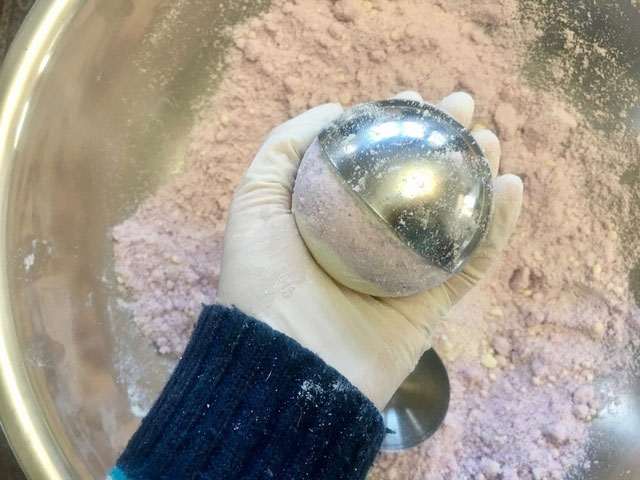
Set the bath bomb aside to dry.
Molding Bath Bombs with Plastic Molds
Gently press some of the mixture in one half of the plastic bath bomb mold.
Mound a little more mixture in the center of the bath bomb. Clean off the edges of the mold using your finger.
Repeat with the second half. (Note: make sure you are using the corresponding half of the mold!) Press the two halves together. Line up the eyelets and snap the mold shut.
Repeat with the remaining molds. Allow the bath bombs to sit on the counter top for two hours. Unsnap the covers and clean the edges with a paper towel, if desired. This step is not necessary, but it does make a smoother presentation.
Allow the bath bombs to dry with one half of the molds removed for two more hours or overnight. Replace the covers, or remove the bath bombs from the molds.
Drying, Storing and Shipping your Bath Bombs
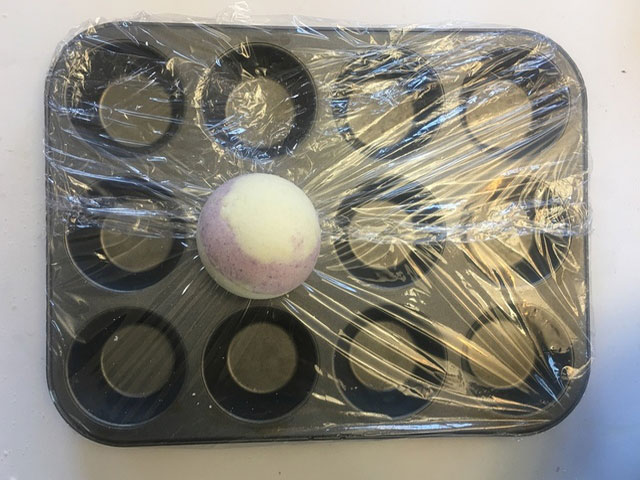
Bath bombs are vulnerable to deforming on the bottom during the first hour after molding. If you don’t mind your bath bombs having flat bottoms, you can set them on a baking tray to dry. If you want your bath bombs to be perfectly round, you will need to provide them with some form of support. If you use the plastic molds, you don’t need to worry about your bath bombs deforming; the mold will support them. For bombs made with the Perfector or Stainless Steel Molds, you have a couple of options. You can pour a layer of baking soda on a tray and create a small divot for each bath bomb to rest in. This method works well, but is very messy. Egg crate foam is another option, but you will still experience some deforming. Most recently, I have had the greatest success using a muffin pan lined with plastic wrap. Don’t pull the plastic too tight – you want to create a little hammock for the bath bombs to rest in while they dry. For small bath bombs, try using mini muffin pans.
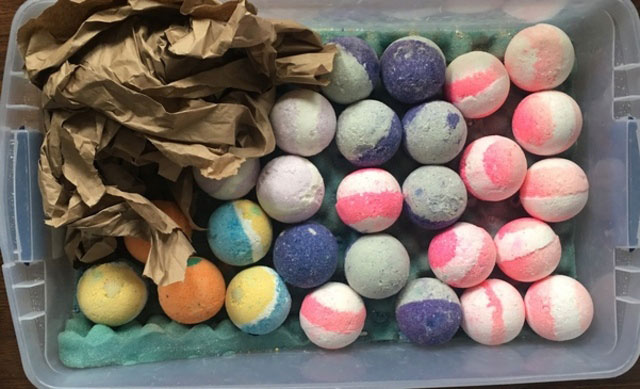
Dry your bath bombs overnight. To store your bath bombs, place them in a plastic sweater box lined with egg crate foam. To keep your bath bombs safe, pack them in shoulder to shoulder. If there is space left in the box, stuff it with crumpled paper, a sheet or tissue paper. Store your bath bombs away from direct sunlight in a dry place. Well-made bath bombs should last about 6 months. You may choose to shrink wrap your bath bombs to protect them.
If you have made your bath bombs well, they should be sturdy enough to ship. Wrap each bath bomb in two large pieces of tissue paper and pack them tightly into a box filled with packing peanuts or other packing material. Stuff the box as tightly as possible. If you suspect the box might get wet, enclose your tissue wrapped bombs in a plastic bag. You may want to test ship a few of your bath bombs to a friend before you sell them to customers in faraway places. Bath bombs are not as shippable during the humid summer months.
We hope that this guide helps you with making the bath bombs of your dreams. Once you have mastered the techniques and recipes above, you will find it easy to creatively make all sorts of bath bombs you will love!
Find More Bath Bomb Making Info Below!
SHARE ON SOCIAL MEDIA
![]()
![]() Share this tutorial on Facebook
Share this tutorial on Facebook![]()
![]() Tweet about this tutorial
Tweet about this tutorial


